PCoIP Session Health Check - Diagnostics and troubleshooting guide
Summary
To receive a detailed diagnostic report, create a support/log file bundle and then submit this bundle to the PCoIP health check tool. Once the files are submitted, it will take 5-10 minutes to produce a detailed report. The report will be sent to your registered e-mail address.
If you do not wish to submit your diagnostic data to Teradici for analysis, the remaining section of this article will provide examples on how to manually check your system log files for common host issues.
Table of Contents
Sequence Diagrams
Health Checks
- Client Session Health Check
- Host Session Health Check
- Connection Manager Session Health Check
- Security Gateway Session Health Check
Sequence Diagrams
The following PCoIP Session Connection Sequence Master Diagrams provide details on the messages exchanged to connect or disconnect PCoIP sessions.
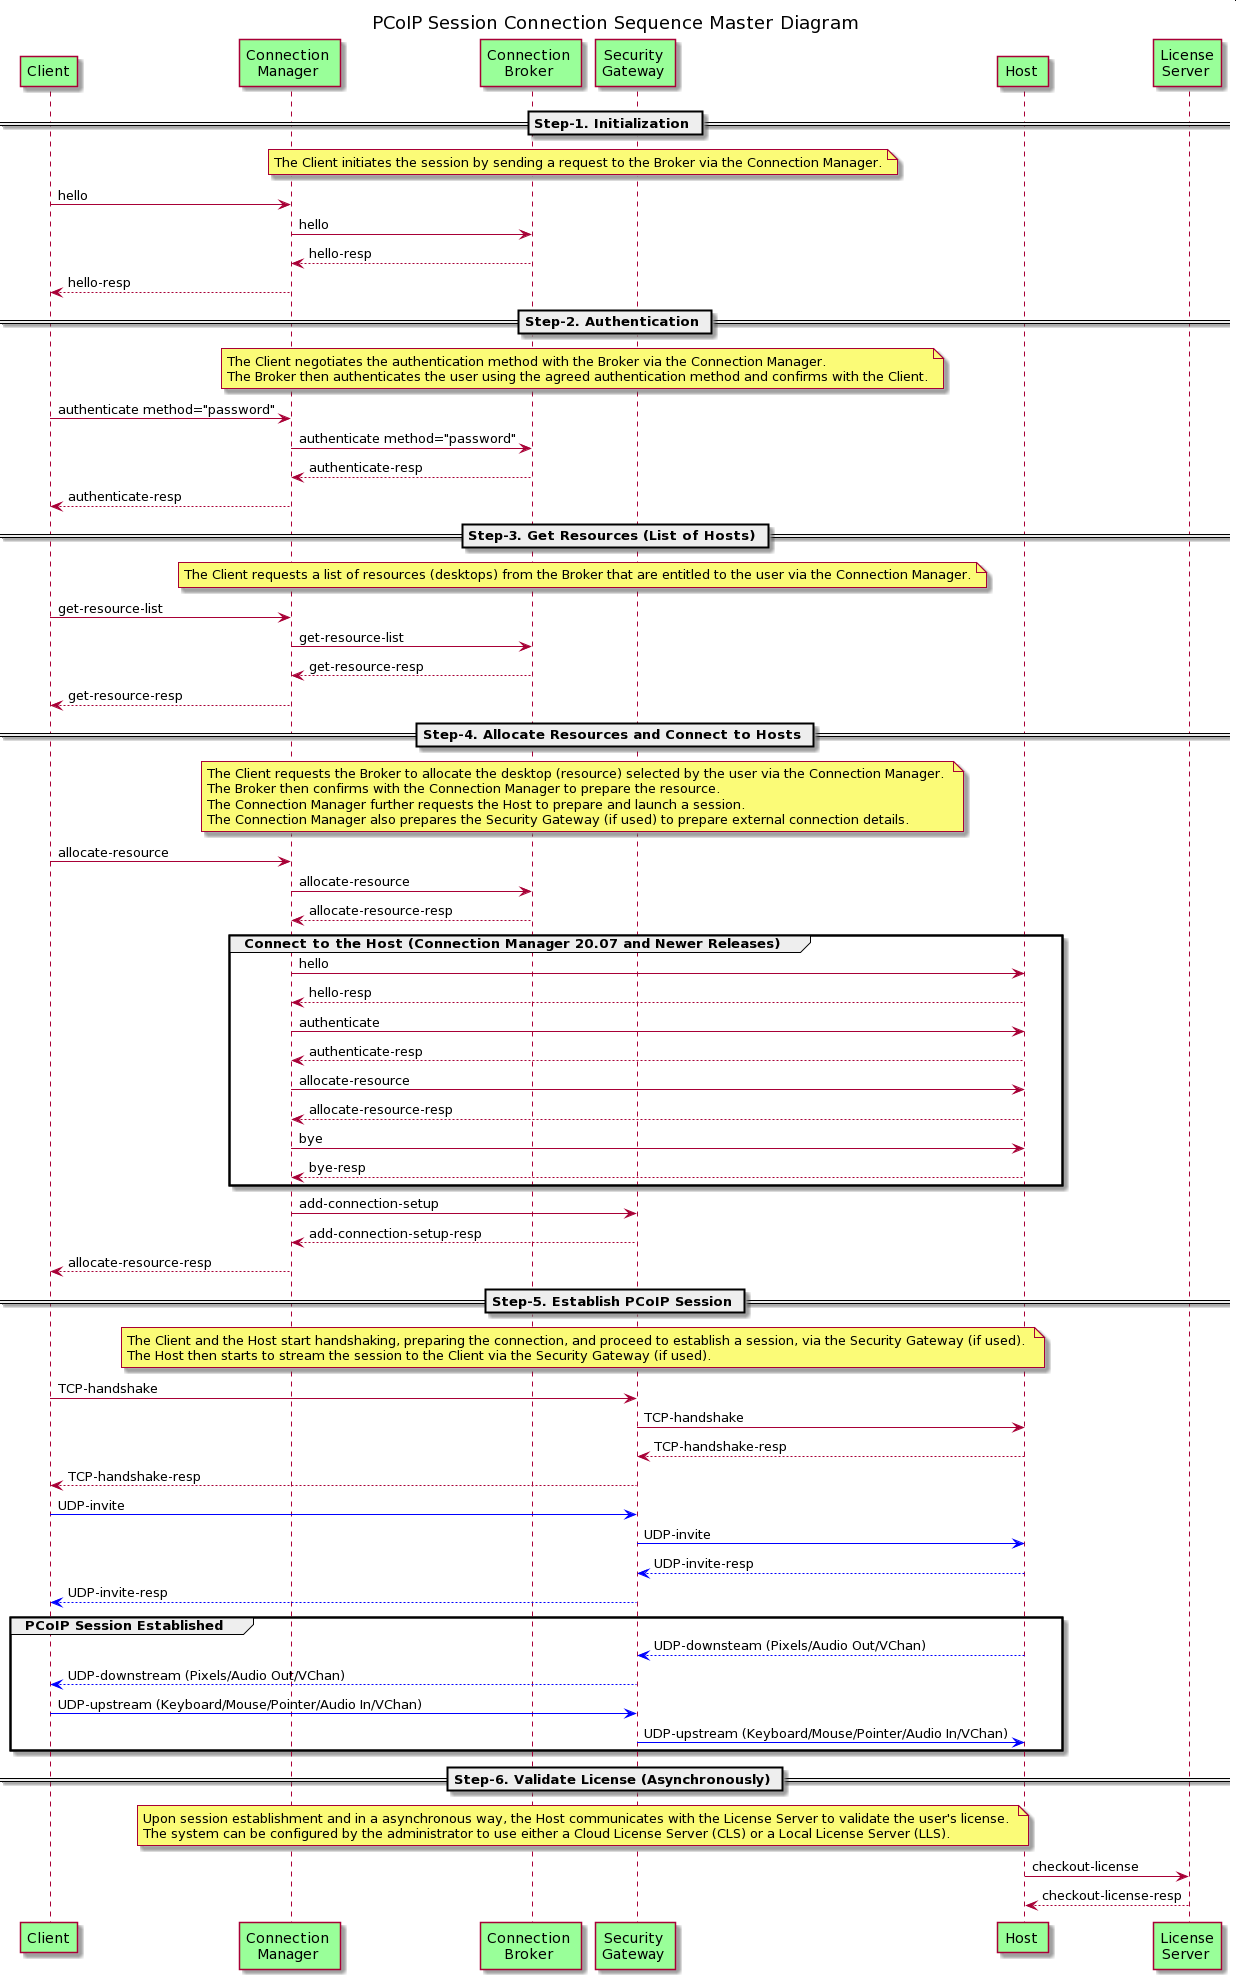
Establishing a PCoIP Session
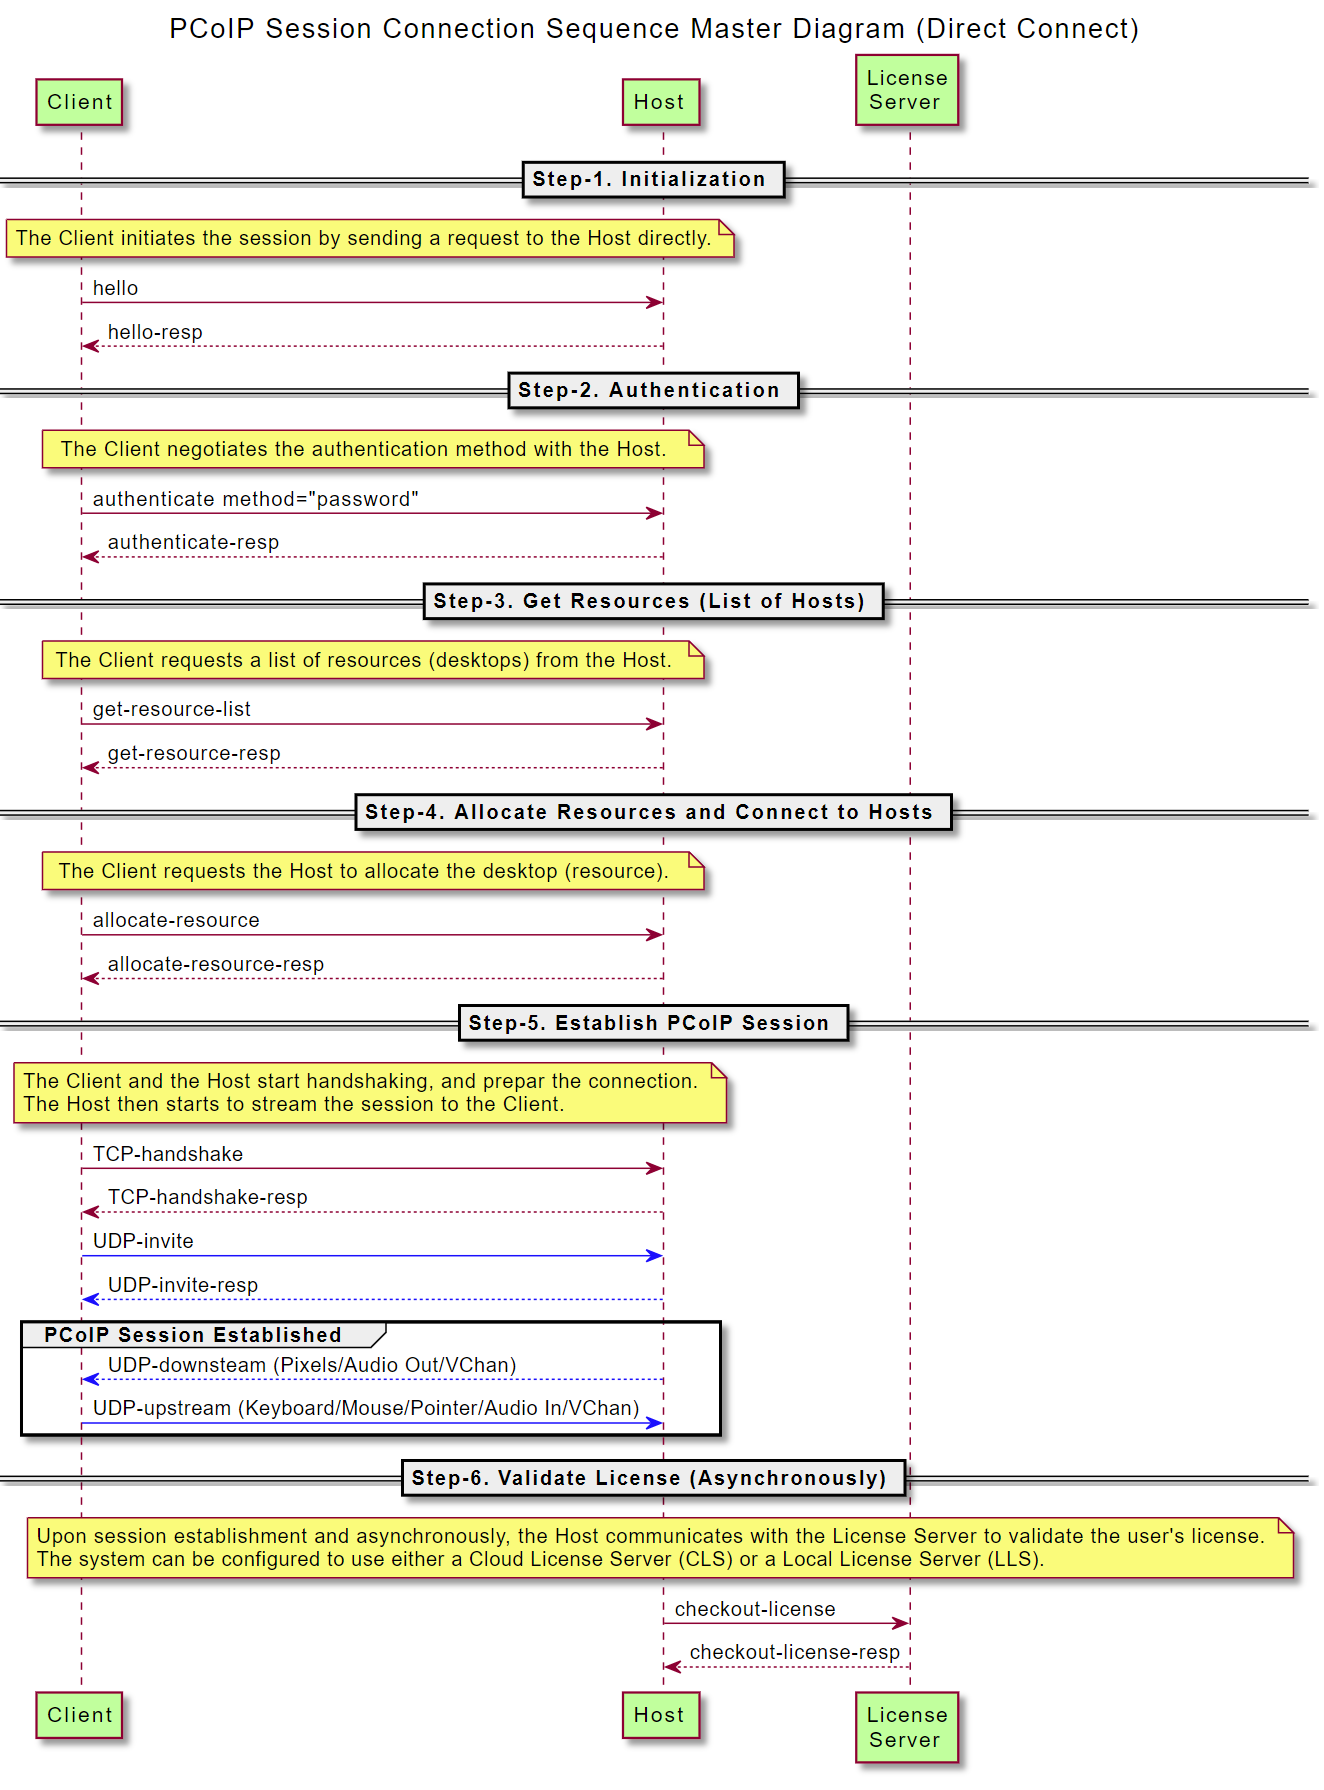
There are six steps (stages) required to establish a successful PCoIP Session.
- Initialization
- Authentication
- Get Resources (List of Hosts)
- Allocate Resources and Connect to Hosts
- Establish PCoIP Session
- Validate License
PCoIP Session Establishment when using a Connection Manager (CM)/Security Gateway and a Connection Broker.
PCoIP Session Establishment without Connection Manager (CM): Direct Connect

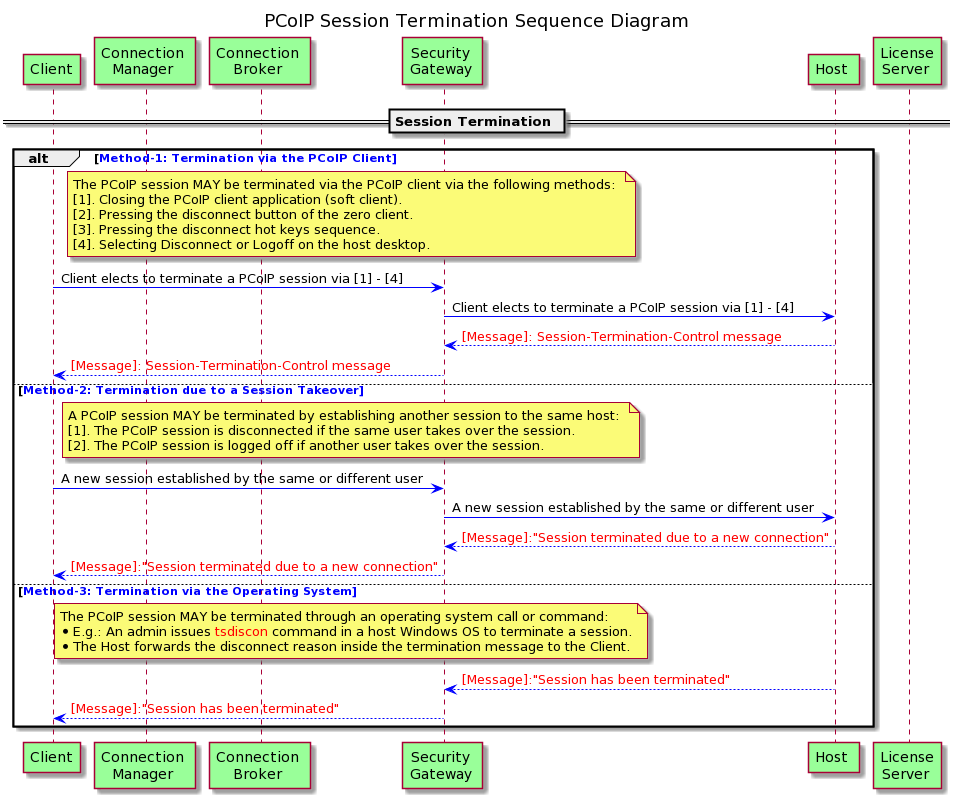
Terminating a PCoIP Session (Sequence Diagram)
The PCoIP session MAY be terminated/disconnected via the following methods:
- Directly through the PCoIP client.
- Directly through another PCoIP client session takeover.
- Indirectly through the operating system (OS).
The PCoIP Brokers typically provide a mechanism to terminate the remote/PCoIP session using Method #3.
-
For example, a button to disconnect or logoff the user. The broker typically terminates the PCoIP sessions via a Broker Agent that runs on the PCoIP agent machine. The Broker Agent MAY terminate the PCoIP session using the APIs provided by the operating system (for example Windows tsdiscon API).