How to upload provisioning template and post script files to customer storage in HP Anyware Connectors for Azure
HP Anyware has changed the file names, locations and install paths of the PCoIP Agents. This KB provides instructions on how to update previously installed HP Anyware Connectors for Azure with these new locations to ensure that new remote workstations use the latest release of the PCoIP Agent.
If you try and provision remote workstations to HP Anyware Connectors for Azure with an older PCoIP Agent version you will receive the following error message:
"Attempt 5 of 5 to download PCoIP Agent installer failed. Error Information: Response status code does not indicate success: 404 (Not Found)"
If you do not have the TLS 1.2 update, you will receive the following error message:
"Attempt 5 of 5 to download PCoIP Agent installer failed. Error Infomation: The request was aborted: Could not create SSL/TLS secure channel"
NOTE: Any new HP Anyware Connector deployments (i.e, NOT an upgrade of an existing deployment) for Azure installs since November 14, 2020 will automatically use the latest version of the PCoIP Agent.
- If you do not run this update then you will be unable to deploy remote workstations to a HP Anyware Connector.
- This KB article does not apply to HP Anyware Connectors for GCP, AWS and On-Premises.
1.Download the template JSON files from Windows Graphics Agent template and Windows Standard Agent template and agent install script files from https://teradeploy.blob.core.windows.net/binaries/Install-PCoIPAgent.ps1.zip and https://github.com/teradici/deploy/blob/master/remote-workstations/new-agent-vm/Install-PCoIPAgent.sh to your local machine.
2. Login to the Microsoft Azure portal.
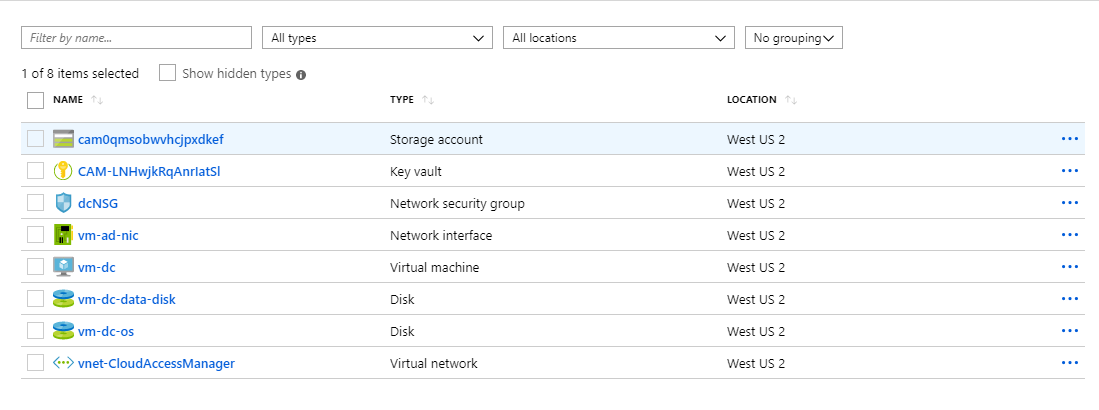
3. Find the resource group that your deployment belongs to. Choose the root group (the group that does not end in -CN# or -RW)
4. Open the resource group.
5. Click the Storage Account resource from the resources list in the right pane that starts with cam.

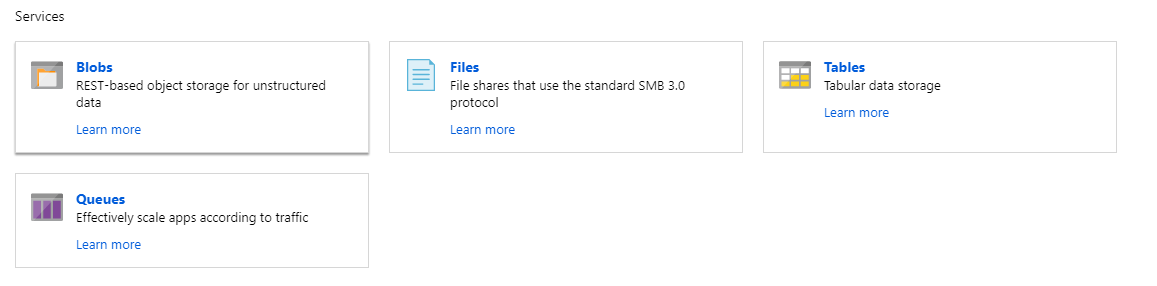
6. Click the Blobs under the Services section.

7. Click the container cloudaccessmanager.
8. There are two directories. Upload the zip file Install-PCoIPAgent.ps1.zip and Install-PCoIPAgent.sh to the remote-workstation folder and upload the JSON ARM templates to the remote-workstation-template folder.
Note: If the workstations are deployed using image, make sure in the image the old file 'Install-PCoIPAgent.ps1' is deleted in directory 'C:\Packages\Plugins\Microsoft.Powershell.DSC\2.77.0.0\DSCWork\Install-PCoIPAgent.ps1.0', and create a new image out of it. Otherwise, the new script will not take effective.
9. Click the upload menu to open the side bar windows.
10. Click Select a file and pick up files from your local machine. Also click the Overwrite if files already exist check box.
11. If you want to keep the original ARM templates you can upload the new files with a different name. Ensure that you copy the appropriate *.customparameters.json to have the same name.