How do I upgrade PCoIP Management Console 2.0 to 2.x?
For the purpose of this article, instructions will refer to upgrading PCoIP Management Console 2.0.0 to 2.0.1.
Note: Downgrading to an older MC version is not a supported operation.
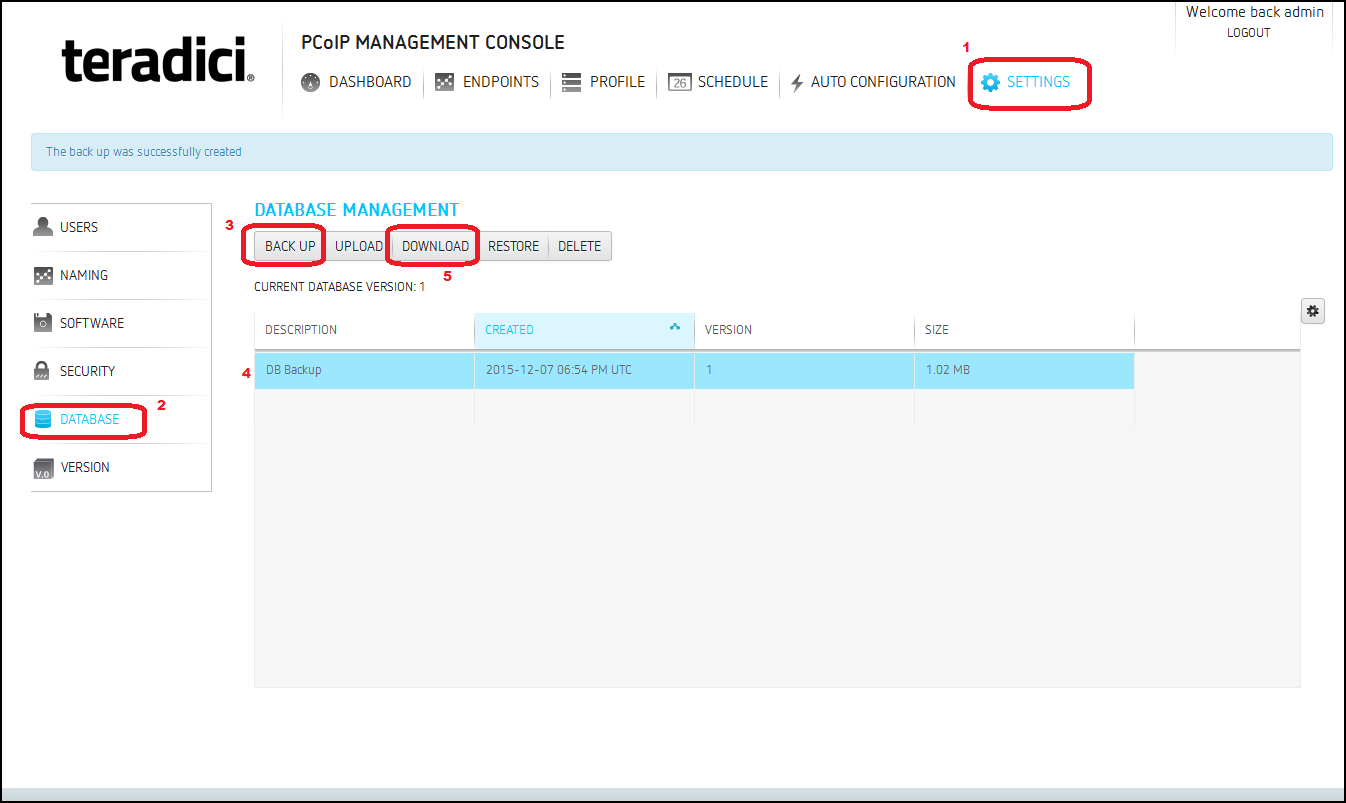
- Log in to the web interface of MC 2.0.0. Go to SETTINGS, DATABASE. From there Select BACK UP and back up your database. After the back up has completed, select the backup in the table and click DOWNLOAD and download the database to a known location, as you will need to retrieve it later.

- If your MC is configured to use static IP addressing, then log into the console of MC 2.0.0 using the vSphere console or SSH, logging in as root using whichever password you have set for root, and record the following information:
- IP Address and Netmask. Run less /etc/sysconfig/network-scripts/ifcfg-eth0
- Gateway, Hostname. Run less/etc/sysconfig/network
- Hostname. Run less /etc/hosts
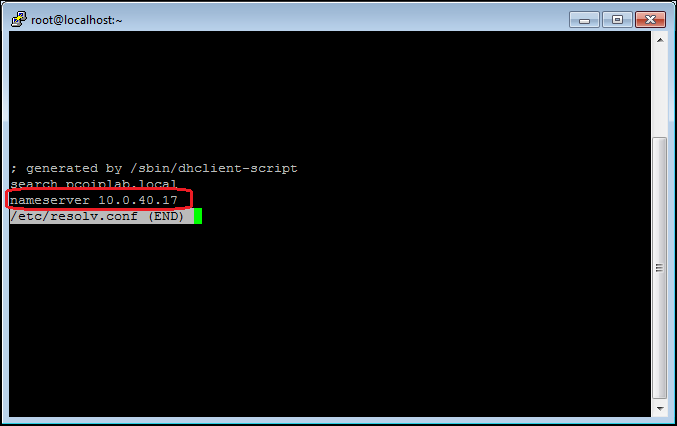
- DNS name servers. Run less /etc/resolv.conf

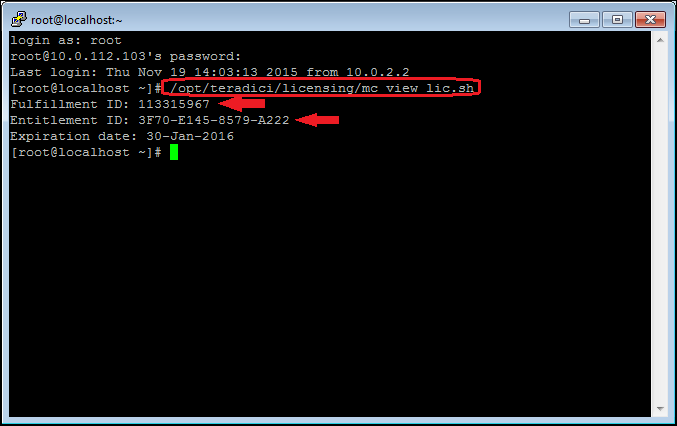
- License activation code (entitlement ID) and fulfillment id. This is retrieved using the /opt/teradici/licensing/mc_view_lic.sh command.

- If you are using a custom certificate in MC 2.0.0, ensure you have a copy of it somewhere where you can retrieve it.
- If you plan on using a brand-new certificate you will want to ensure all zero clients are appropriately configured (we recommend using the same certificate as on your previous MC):
- Update your device profiles in MC 2.0.0 to include the new certificate or its issuer into your profiles and push the update out to every zero client (you will want to ensure that even un-grouped zero clients get the new certificate). If necessary, you can use the AWI for each individual zero client to upload the new certificate or its issuer to the device.
- Still logged into MC 2.0.0, deactivate the enterprise license using /opt/teradici/licensing/mc_return_lic.sh -f <fulfillment_ID>, or if behind a proxy using /opt/teradici/licensing/mc_return_lic.sh -f <fulfillment_ID> -p [<user:password>@] <proxyhost:port>. The fulfillment id was recorded in step 2.5.
- Shut down the MC 2.0.0 virtual appliance.
- Following the user guide, deploy the new version of Management Console.
- Log into the console of Management Console using vSphere Console or SSH and change the root password.
- Modify MC 2.0.1 to use the same network settings as MC 2.0.0 did. If you are using DHCP reservation, then reserve the IP address against the new server. Otherwise, follow the steps from the user guide to set the hostname, DNS name servers, IP address, netmask and gateway using the information gathered in step 2.
- Restart MC 2.0.1 to ensure it has the correct addressing information.
- Activate the enterprise license on MC 2.0.1 using /opt/teradici/licensing/mc_activate_lic.sh -k <entitlementID> or if behind a proxy /opt/teradici/licensing/mc_activate_lic.sh -k <entitlementID> -p [<user:password>@] <proxyhost:port>. The entitlement id was recorded in step 2e.
- Log into the MC 2.0.1 web interface as admin/password.
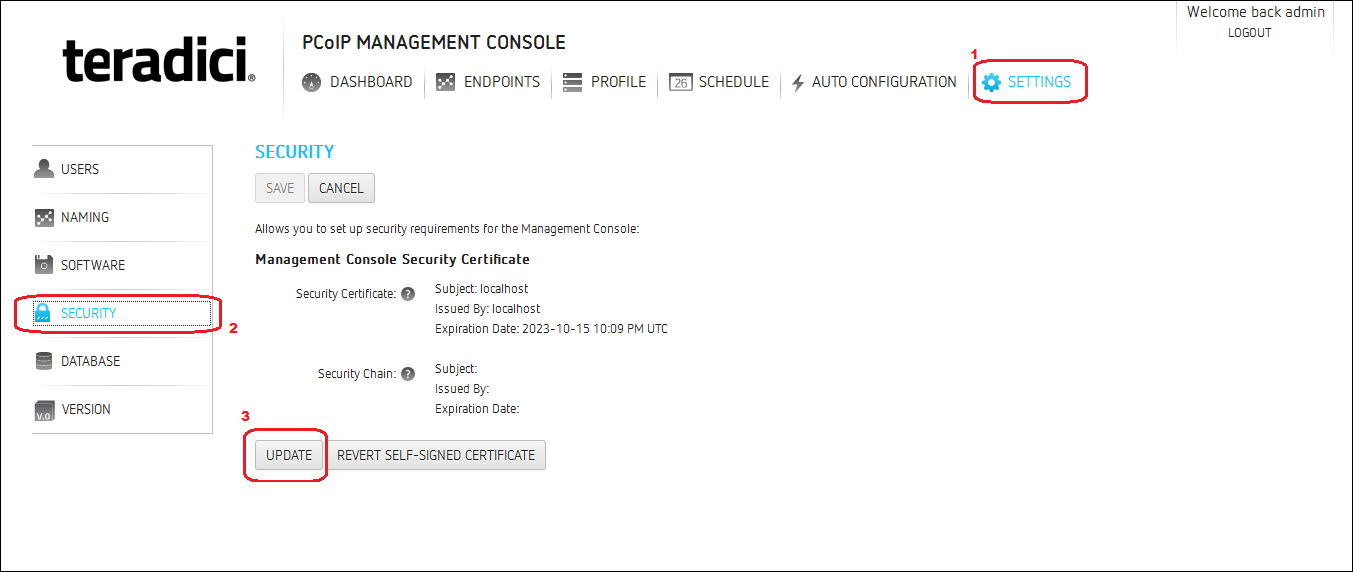
- If you were not using the default certificate with MC 2.0.0, install the new certificate from step 3 or 4. This is done through SETTINGS, SECURITY and clicking UPDATE.

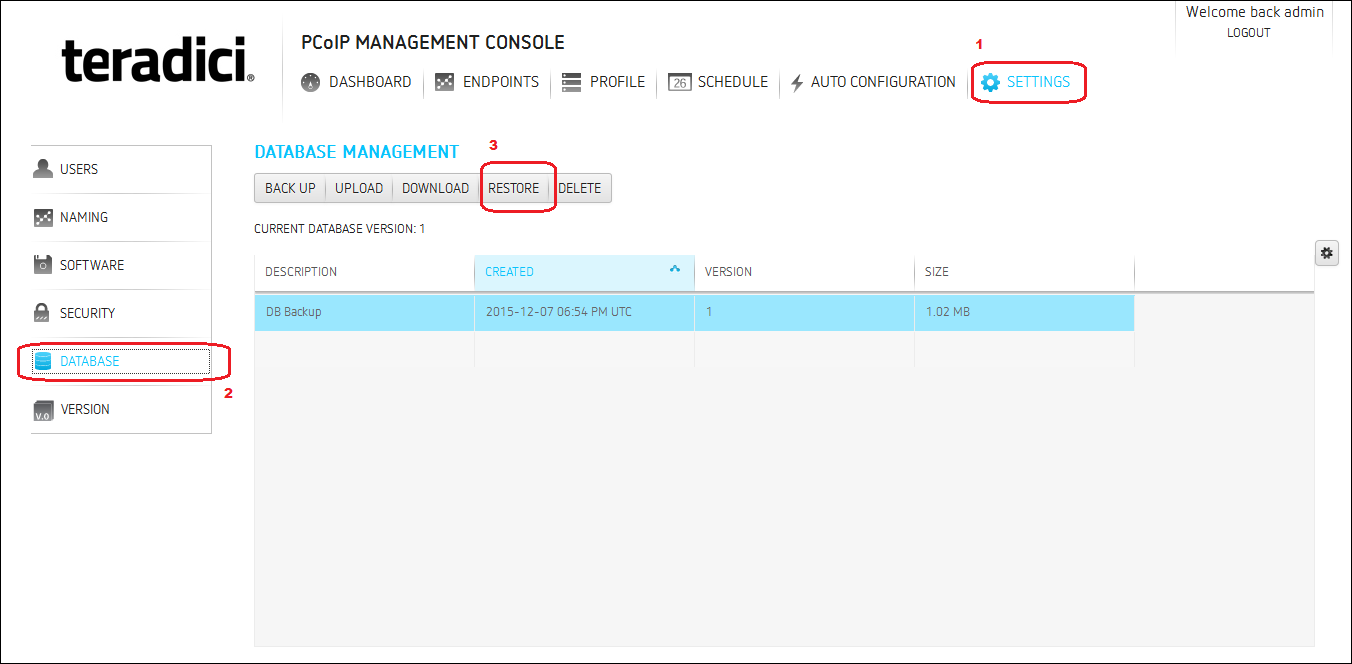
- Restore the database from SETTINGS, DATABASE. First click UPLOAD and select the backup you downloaded in step 1. Then click the back and click RESTORE.

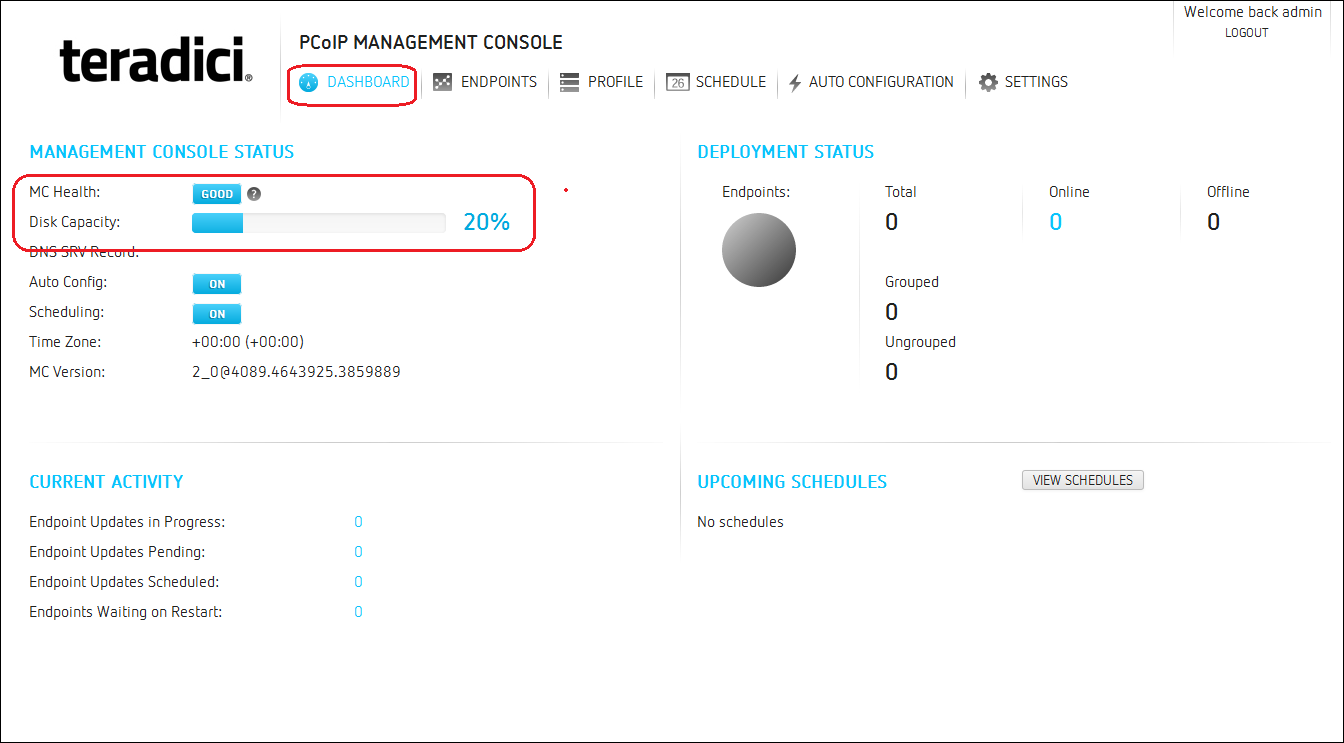
- Ensure the MC health is good on the DASHBOARD.

- Log out and log back in using your standard administration user account.
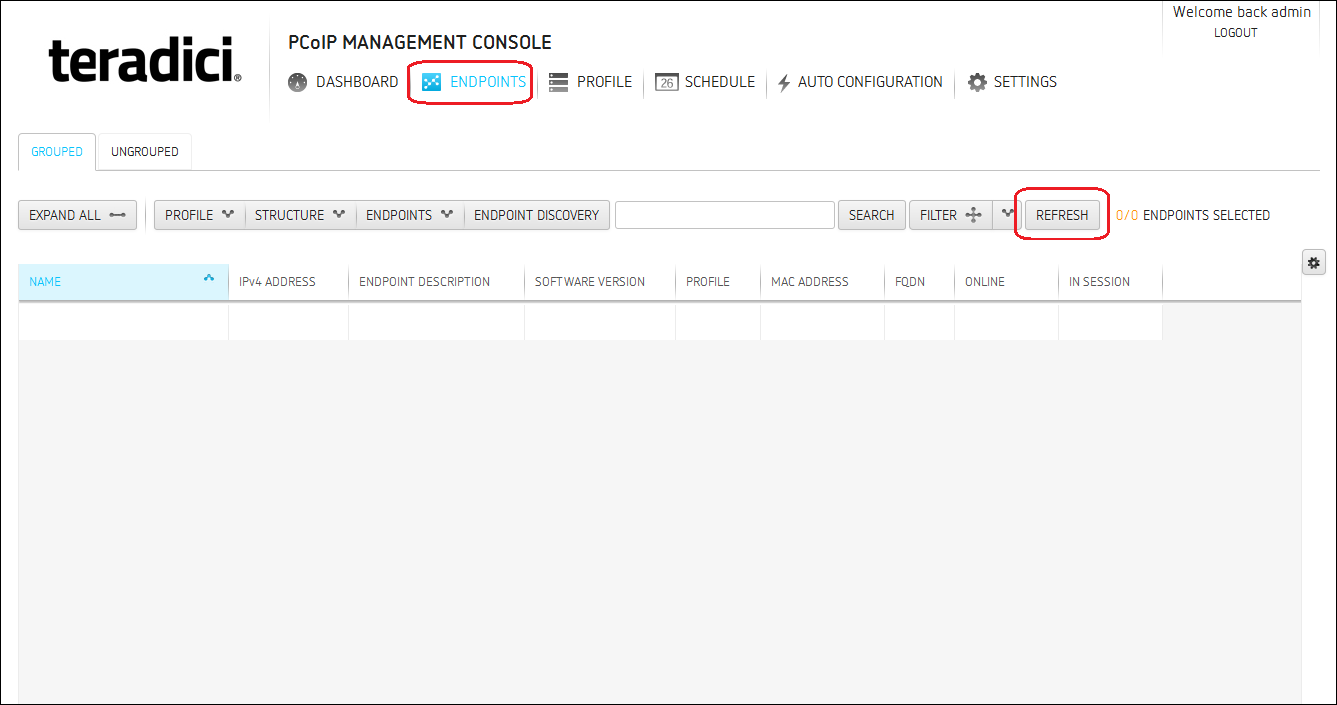
- Viewing the ENDPOINTS page and using the REFRESH button, you should see devices starting to contact the new MC. You can verify groups, profiles, schedules and auto configuration rules at this time.